 Christmas Mega Sale – Enjoy Up to 50% OFF on Every Plan!
Your website’s speed plays an important role in providing great user experience. A slow site can lead to more people bouncing from your site. You can lose some valuable traffic, your search rankings can take a hit, and even your conversion rate can drop.
When it comes to the speed of your website, there is more at stake than you think. It directly correlates to user and customer satisfaction. So, you must make serious efforts to ensure that your website’s user experience is perfect.
Every little thing that you do to improve the site performance by a bit will eventually add up. One simple thing that you can do to speed up your WordPress website is to enable browser caching.
In this article, we’ll take a look at what is browser caching and how you can enable browser caching for your WordPress website.
What is Browser Caching?
A website is made up of a number of files that fit together to create a series of webpages. Some of these files will contain text, some will contain styling information for page elements, some will be images, and so on.
Whenever you explore a well-built website, you’ll most likely notice a lot of common elements. All the pages share a common style, the logo’s the same on all pages, the dropdown menus are always available, and other such similarities.
So, if there are common elements on all the pages of a website, it doesn’t make sense to download all of them every time someone loads a new page. It would be much better to load such common elements once, store them within the user’s browser and then simply reuse them as required. For example, these common elements can be reused when someone goes from one page to another within the site, or when someone revisits the site at a later date.
This is the theoretical basis and meaning of browser caching. Simply put, browser caching checks the files that you’ve defined as files that don’t change often and download them to the visitor’s browser just once. Once saved to the browser cache, these files won’t be downloaded again and can be reused from this saved copy. This will reduce the load on your site’s hosting servers and it’ll significantly reduce the time it takes to load subsequent pages.
How to Leverage Browser Caching in WordPress?
Browser caching isn’t specific to WordPress. So, the method of enabling it is the same no matter what system you use.
Enabling Browser caching isn’t difficult but can be a bit tricky since it involves editing one of you site file in the FTP (more on this later).
Here, we will provide you with two ways in which you can enable browser caching for your WordPress website. One is a simple way out and the other is a little tricky.
Method 1: Talk to your Hosting provider
To leverage browser caching, you’ll have to edit a file called the .htaccess file. An error in this file could cause your entire website to become temporarily inaccessible. So, if you’re not sure about what to do, it might be best to ask your host to do it for you.
This is the safest option. If you’re using a good WordPress hosting company, they’ll surely be able to set this up for you within a few minutes.
Method 2: DIY – Edit .htaccess file
The .htaccess file in your FTP is a powerful file that allows you to speed up your site, create redirects, apply compression, and more. But, be careful. An error in this file will likely cause your whole site to go down!
Due to the critical nature of this file, I’d recommend experimenting on a test site before working on the important live site.
Firstly, you’ll need to access your server’s files. The most common way to do this is via FTP (file transfer protocol). The file can be a bit tricky to find since it’s a dotfile. A dotfile is a hidden file on a Linux-based system, but most FTP editors have a ‘show hidden files’ option that’ll permit you to view these files.
The .htaccess file should be in your main WordPress folder. This is the folder containing the wp-content, wp-includes, and wp-admin folders. Once you’ve found the file, you’ll have to add the following code using a plain text editor:
ExpiresActive On
ExpiresByType image/jpg "access plus 1 year"
ExpiresByType image/jpeg "access plus 1 year"
ExpiresByType image/gif "access plus 1 year"
ExpiresByType image/x-icon "access plus 1 year"
ExpiresByType image/png "access plus 1 year"
ExpiresByType text/css "access plus 1 month"
ExpiresByType text/x-javascript "access plus 1 month"
ExpiresByType application/x-shockwave-flash "access plus 1 month"
ExpiresDefault "access plus 2 days"
This code tells the user’s browser how to cache different types of files. Jpg, jpeg, gif, icons, and png images are set to be cached for a year since these files rarely change. CSS, JavaScript, and Flash files are set to be cached every month. This is because these files are liable to change. The default is set to 2 days for all such files that aren’t otherwise specified.
Checking Results
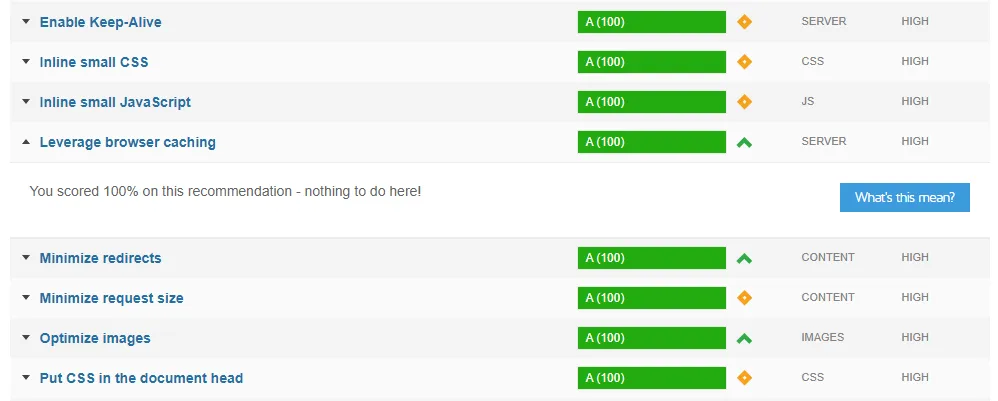
There are a number of ways to check whether or not a site has browser caching enabled, with one of the easiest using a free site-speed testing tool called GTmetrix. If your site scores an ‘A’ then the browser caching has been successfully enabled for your website.
PS: Since cached files will be stores in the memory for quite some time, development may be difficult. So, I’d strongly recommend you not use browser caching for websites that are still in active development.
Final Words
Browser caching can significantly improve the speed of our website. Moreover, since it only involves copying and pasting a few lines of code, enabling it is almost definitely something worth doing. This is more true when you find out that there are no disadvantages to doing
this. Use this simple method to improve the speed of your WordPress website or any other website, for that matter!
Got any questions for us? Let us know in the comments and we’d be happy to help you out.
You can also write to us about the more serious issues that you’re facing.

If you wish for to grow your knowledge simply keep visiting this website and be updated with the newest information posted here.
I conceive you have observed some very interesting points in this post.
Thanks for the article post. Really thank you! Great.
Pretty! This has been a really wonderful post. Thanks for supplying these details.
I need to thank you for this wonderful post!! I definitely
loved every bit of it. I have you book-marked to check out new things you post…
This piece of writing will help the internet users for setting up new weblog or even a blog from start to end.
Awesome Post! Someone in my Facebook group shared this site with me so I came to take a look.
Thank you very much for your support. It is very much appreciated.
If some one desires expert view on the topic of blogging afterward I recommend him/her to pay a quick visit this weblog, Keep up the good work.
This is actually a wonderful web site. Keep it up.
Wow, fantastic blog structure!
The overall glance of your site is wonderful, as smartly as the content material!
Great article, totally what I needed.
Wonderful website! I just wanted to provide you with a quick heads up!
Wow, that’s what I was looking for, what a guide!
Thanks admin of this website.
Hi!
Your blog provided me valuable information. You have done a outstanding job!
Hey! Someone in my Myspace group shared this site with
us so I came to take a look. I’m definitely enjoying the information. I’m bookmarking and will be tweeting this to my followers!
Fantastic blog and excellent style and design.
I’ve been reading your blog for a long time.
Just wanted to tell you to keep up the fantastic job!
Pretty! This was a really wonderful post. Thank you for your provided information.